Food blogs are everywhere these days. Many people want to know how to start a food blog and share their own recipes. From home cooks to professional chefs, everyone is joining the online food world. Starting a food blog can be fun, and it can also help you earn money.
Some bloggers do it as a hobby, while others make it their job. But all of them love sharing their cooking stories and recipes. This guide will help you start your own successful food blog, step by step. Whether you want to post recipes, talk about food trends, or just share photos of your meals, we’ve got you covered.
Quick Summary
Want to start your own food blog? Here’s a quick rundown:
- Pick a food blog niche.
- Choose WordPress as your blogging platform.
- Buy a domain from NameCheap and a reliable web host like Siteground.
- Install WordPress.
- Pick Foodica as your food blog theme.
- Install a recipe plugin like Recipe Card Blocks and other useful WordPress plugins.
- Plan your blog posts and start blogging.
- Promote your blog on social media channels.
- Find ways to earn money from your blog.
- Build a community around your blog.
Now, let’s dive into the details!
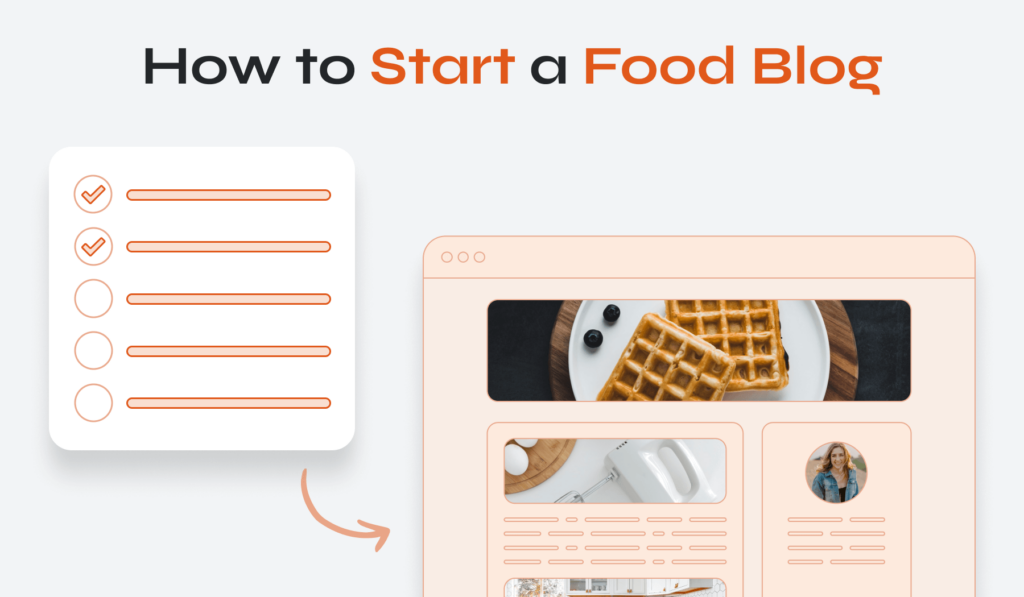
How to Start a Food Blog in 10 Steps
Starting your own food blog can seem a bit tricky at first. But with the right steps, it’s easier than you think. Whether you want to share your own recipes, review restaurants, or just talk about food, this guide will help you get started. Let’s break it down step by step.
1. Pick Your Niche
Before you dive into blogging, think about your focus. Picking a niche helps you stand out and attract readers. Here are some ideas:
- Vegan Recipes: Share plant-based meals and tips.
- Regional Cuisines: Explore dishes from specific parts of the world.
- Desserts: For those who love baking and sweets.
When you start a food blog, choosing a niche is key. It helps you find a target audience who’s really interested in your content. For example, if you’re all about baking, a dessert blog will pull in readers who crave sweet treats. This way, your blog has its own special spot among many other food blogs.
2. Choose a Blogging Platform
When starting a food blog, the platform you choose is crucial. WordPress is a favorite Content Management System for many reasons, to mention a few:
- User Friendly: WordPress is easy to navigate, even for beginners.
- Customizable: With thousands of WordPress themes and plugins, you can make your blog look and function just how you want.
- SEO-Friendly: WordPress is designed to help your blog rank well on search engines.
- Community Support: A large community of users means plenty of forums, tutorials, and resources to help you out.
- Mobile Responsive: Most food blog WordPress themes are optimized for mobile, ensuring your recipe blog looks great on all devices.
- Safe and Secure: Regular updates and a range of security plugins keep your blog protected.
- Free to Start: You can begin with a free version and upgrade as your blog grows.
With these benefits, it’s clear why many successful food bloggers choose WordPress as their blogging platform.
3. Get a Domain and Web Hosting
Once you’ve picked WordPress as your platform, you need two more things: a domain and web hosting.
Choose a Blog Name
A catchy, memorable blog name can be the first step to become a new food blogger. Here’s what to keep in mind:
- Catchy and Memorable: It should stick in people’s minds.
- Relevant to Your Niche: If you’re blogging about vegan recipes, your name should hint at that.
- Simple: Avoid complex spellings. The easier it is to type, the better.
This is how to start a food blog with a strong foundation.
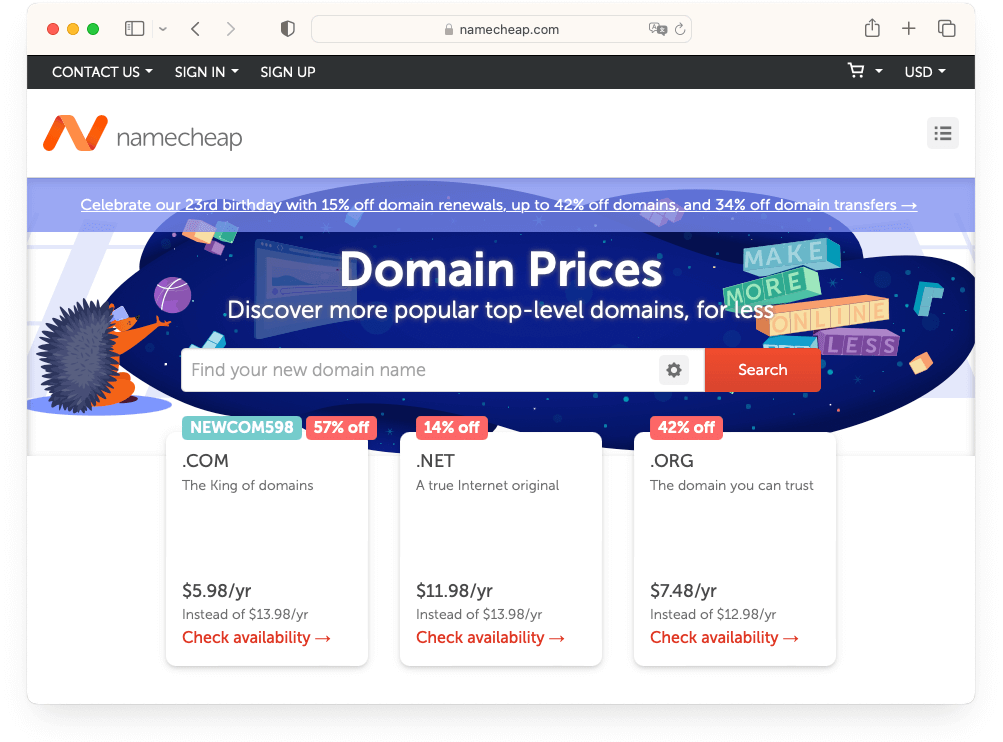
Buy a Domain
This is the web address where visitors can find your blog. Think of it like your home address but online. You can use a domain name generator to get ideas.
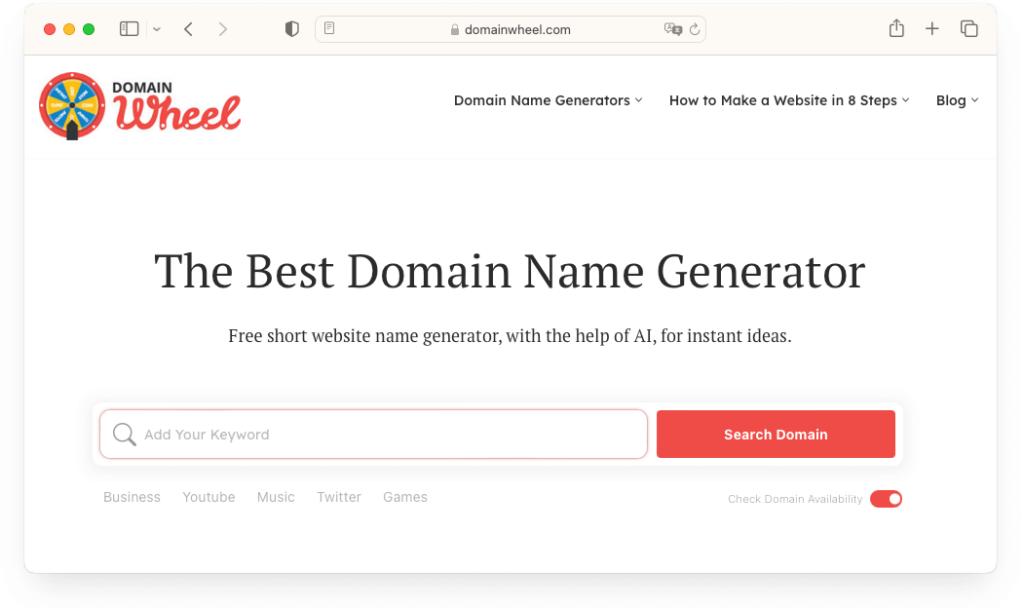
Once you’ve picked a name, you can buy it. We suggest using NameCheap.
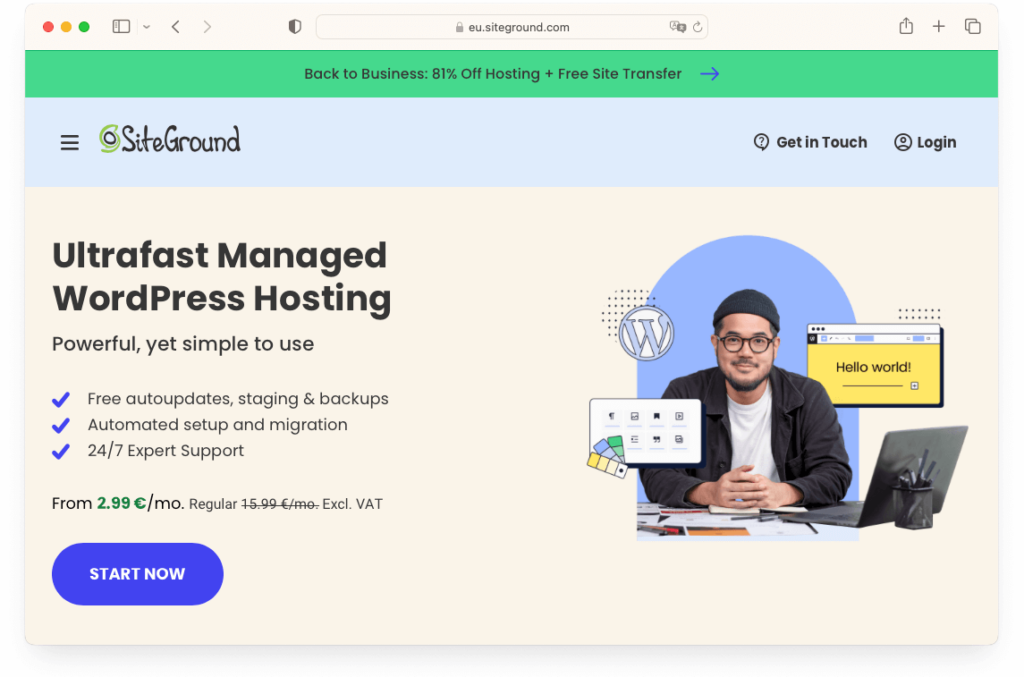
Buy Web Hosting
Hosting is like the land where your blog’s house (website) sits. It’s important to pick a reliable web host.
Here’s why:
- Site Speed: A good web hosting will make your blog load quickly.
- Security: Protect your blog from online threats.
- Uptime: Ensure your blog is always online and not down.
We recommend Siteground. They’re trusted by many and offer great service.
Some hosting providers even give you a free domain name when you sign up. Make sure to check what other hosting providers we recommend.
4. Install WordPress
Now that you have your domain and hosting ready, it’s time to install WordPress. Don’t worry, it’s simpler than it sounds!
Access Your Hosting Dashboard: Once you’ve bought hosting, you’ll get access to a dashboard. Log in there.
Find the WordPress Installation Option: Most hosts, like Siteground, have a one-click WordPress installation feature. Look for it.
Follow the Setup Prompts: Click on the installation option and follow the step-by-step instructions. You’ll choose a username, password, and some basic settings.
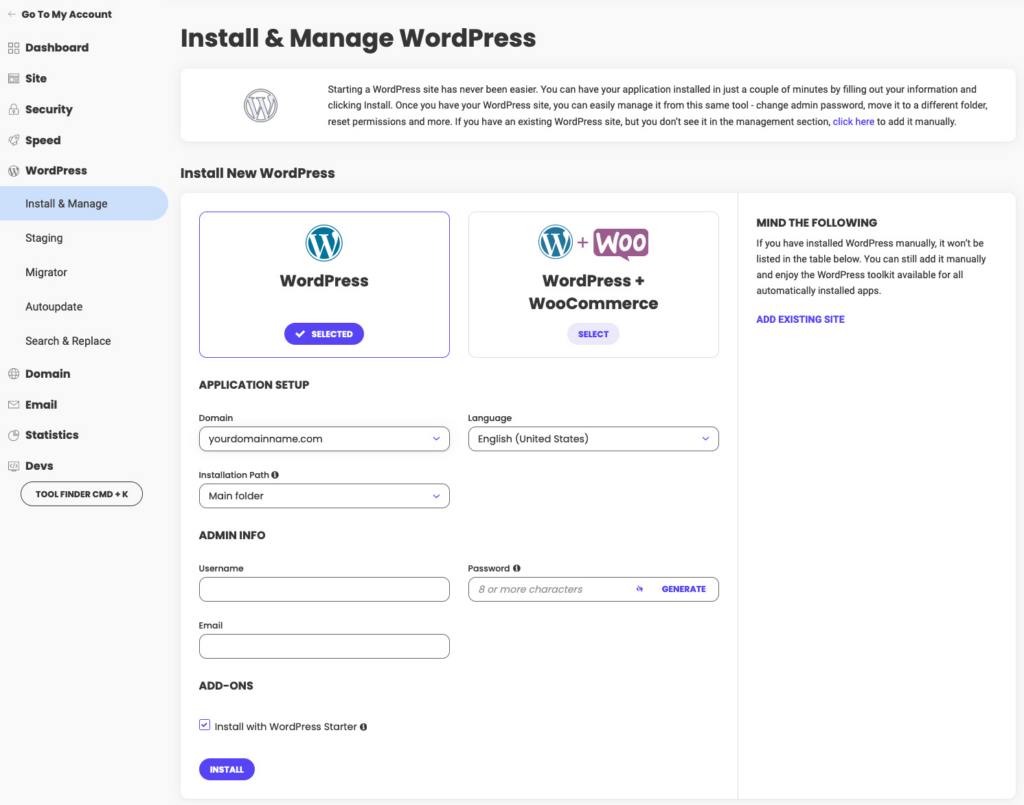
Log into WordPress: After installation, you’ll get a link to your WordPress dashboard. Use the username and password you set up to log in.
And that’s it! You now have a WordPress blog. The next step is to make it look and work the way you want.
5. Choose a WordPress Food Blog Theme
A theme decides how your blog looks. For a food blog, you want something that makes your dishes pop! Here’s how to pick the right WordPress theme:
- Food-Focused: Some themes are designed just for food blogs. They highlight photos and make recipes easy to read.
- Responsive: Many people will read your blog on phones or tablets. Make sure your theme looks good on all devices.
- Customizable: Pick a theme that lets you change colors, fonts, and layouts. This way, you can make your blog truly yours.
Our recommended WordPress theme is Foodica from WPZOOM, a theme designed with food bloggers in mind.
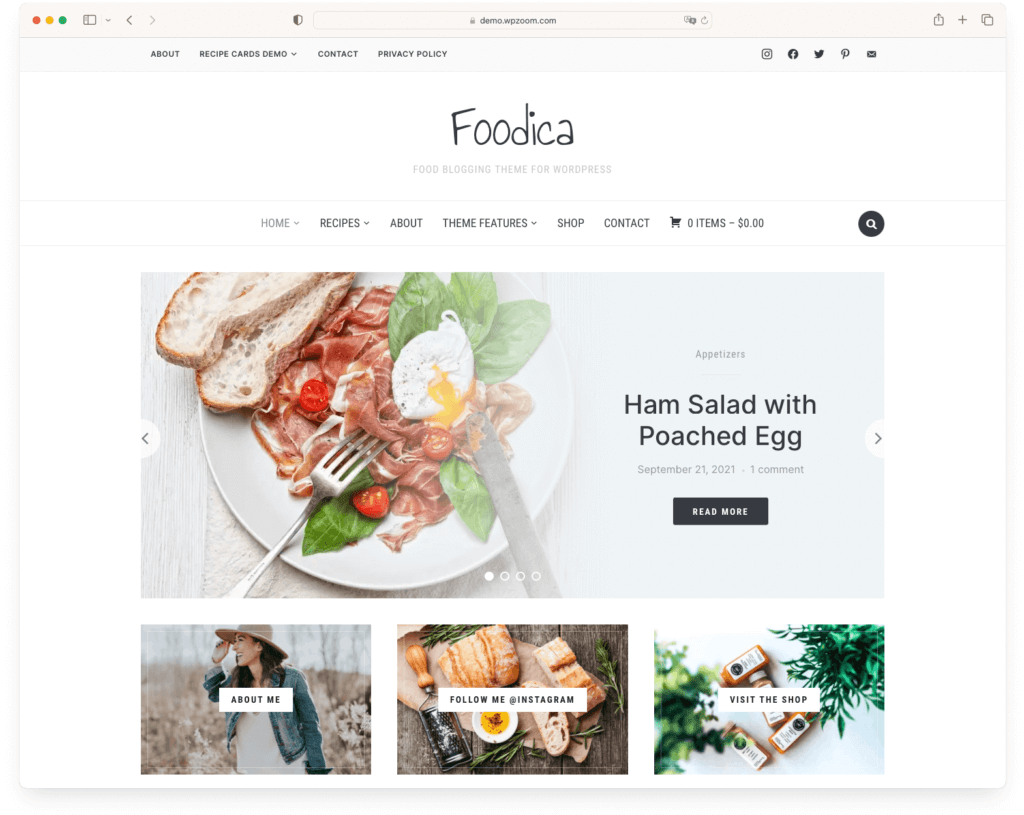
The theme offers a variety of features including a customizable slider, Elementor integration for front-page editing, and a seamless Gutenberg editor experience. With ten distinct color schemes, you can personalize your site’s appearance through the Live Customizer, previewing changes in real-time.
Designed with a strong focus on speed and efficiency, Foodica ensures fast loading times without compromising on aesthetics or functionality.
Whether you’re a seasoned chef sharing gourmet recipes or a food enthusiast blogging about your culinary adventures, Foodica provides the tools and flexibility to create a captivating online presence.
Other beautiful and feature-packed WordPress themes specifically tailored for food blogs:
- Gourmand: Elegant and professional, perfect for a sophisticated touch.
- Cookely: A fresh design with a focus on content.
- CookBook: Ideal for those who want a magazine-style layout.
Remember, while there are many free themes, sometimes it’s worth investing in a premium WordPress theme. They often come with extra features and better support.
6. Install WordPress Plugins
Plugins are like apps for your blog. They add extra features and make your blog work better. For a good food blog, recipe plugins are especially helpful.
A top recipe plugin is Recipe Card Blocks. It can improve your posts by making your recipes more attractive and easier to follow.
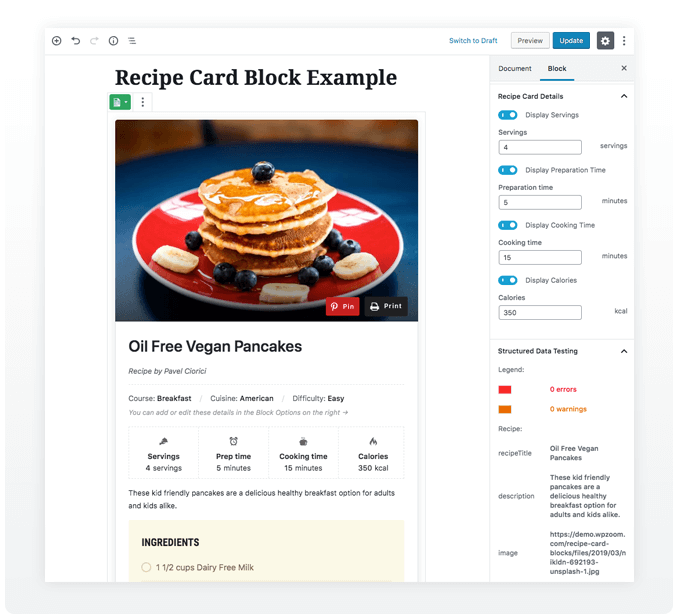
It offers multiple modern styles for recipe cards, a unit conversion feature, and seamless integration with any WordPress theme.
It also features Elementor integration, allowing easy placement and customization of recipes on your website. The structured data markup helps in increasing blog traffic.
Other Important Plugins
- SEO: Yoast or Rank Math can help your blog show up in search engines.
- Performance: The WP Rocket WordPress plugin speeds up your blog, making it load faster.
- Security: Wordfence keeps your blog safe from hackers.
Plugins can make a big difference. They help your blog run smoothly and can add lots of useful features.
7. Start Blogging
With your blog set up, it’s time to start creating food blog content. Here’s how to get started:
Create and Implement a Content Plan
Consistency is key. Readers will come back if they know they can expect new posts regularly. Here’s how to plan:
- Brainstorm Topics: Think about seasonal food recipes, trending dishes, or even reader requests.
- Use Scheduling Tools: Tools like Trello or Google Calendar can help you plan when to post.
- Stay Consistent: Try to post on the same days each week, so readers know when to expect new content.
Importance of Food Blog Photography
Good food photos make your food look tasty! It’s a key element for any successful food blogger. Here’s what to consider:
- Lighting: Natural light works best. It makes food look fresh and appealing.
- Angles: Try different angles to see what showcases the dish best.
- Presentation: Think about the dish’s background and any garnishes.
You can take photos yourself or hire a professional. If you’re doing it yourself, consider using editing tools to make your photos pop.
8. Promote Your Cooking Blog
Having great content is just the start. You also need to get people to see it. Here’s how to promote your new food blog:
- Social Media: Platforms like Instagram, Pinterest, and Facebook are perfect for food blogs. Share photos, connect with other food bloggers, and engage with your audience.
- Collaborations: Team up with other bloggers or brands. Guest posts can introduce you to a new audience.
- Email Marketing: Build a subscriber list. Send out newsletters with your latest recipes or tips.
- Search Engine Optimization Basics: Make sure your new blog is search engine friendly. This includes keyword research, on-page optimization, and getting backlinks.
Remember, it’s all about reaching the right people. Your target audience will love what you share, so find ways to get your content in front of them.
9. Monetize Your Food Blog
Once you have a steady flow of readers, you might think about making money from your own blog. Here are some ways to do it:
- Affiliate Marketing: Recommend products and earn a commission for every sale made through your link.
- Sponsored Posts: Brands might pay you to write about their products or services.
- Selling Digital Products: Create and sell e-books, courses, or other digital content related to cooking or food.
- Ad Networks: Display ads on your blog. Google AdSense is a popular choice. As your blog grows, you might consider premium networks that pay more.
- Offer Services: Use your expertise to offer services like meal planning, cooking classes, or food photography.
Remember, always be transparent with your readers. If you’re getting paid for a blog post or using affiliate links, let them know. Transparency makes a huge difference and builds trust around your blog.
10. Building a Community
Your readers are the heart of your successful blog. As a food blogger, building a strong connection with them can make your new blog thrive. Here’s how to create a community around your cooking blog:
- Engage with Comments: When readers leave comments, reply to them. It shows you value their input.
- Host Events or Webinars: Share your cooking knowledge in live sessions. It’s a great way to interact in real-time.
- Be Authentic: Share your cooking successes, but also your failures. It makes you relatable.
- Create a Dedicated Space: Consider starting a Facebook group or forum where your readers can share recipes, ask questions, and connect with each other.
Building trust and forming a bond with your readers can turn them from casual visitors into loyal fans.
FAQ
Yes, many bloggers earn money through advertising, sponsored posts, affiliate marketing, and selling products or services. However, income varies widely based on audience size, niche, and monetization strategies.
Starting a food blog can be relatively inexpensive. Basic costs include domain registration (around $10-$15/year), web hosting (around $3-$30/month), and a premium WordPress theme (optional, $30-$100). Additional expenses might arise for photography equipment, ingredients, and other tools.
It depends on your goals. If you’re passionate about food and enjoy sharing recipes or reviews, it can be a fulfilling hobby. For those looking to make a profit, success often requires time, dedication, and a unique angle or niche.
Food blogging can be challenging, especially when starting out. It requires consistent content creation, photography skills, and marketing efforts. However, with passion and dedication, many find it rewarding.
Some bloggers receive free products or meals from brands or restaurants in exchange for reviews or promotional content. However, it’s essential to disclose such partnerships to readers and maintain authenticity.
Yes, food blogs remain popular as people continuously seek new recipes, food trends, and culinary insights. However, the landscape is competitive, so standing out requires creativity and a unique voice.
Bottom Line
Starting a food blog is a journey filled with creativity, learning, and connection. From choosing the right niche and platform to engaging with a community of food lovers, every step is a chance to share your passion for food.
With dedication and the right strategies, your WordPress blog can become a go-to space for readers hungry for culinary inspiration.
So, grab your apron, fire up your laptop, and start your food blogging adventure today!